Capture and analyze packets with Wireshark
Wireshark is a widely used, industry-standard tool for capturing and analyzing network traffic. This project is designed to help beginners understand how to use Wireshark effectively, from capturing packets to applying filters and analyzing network data. By the end of this guide, you'll know how to interpret key packet details, troubleshoot common issues, and apply practical skills for real-world network analysis.
What is Wireshark?
Wireshark is a free and open-source network protocol analyzer. It allows you to capture and inspect packets flowing through a network, giving you detailed insights into how devices are communicating. It’s widely used by network engineers, cybersecurity professionals, and IT specialists to troubleshoot issues, optimize performance, and detect anomalies.
Step 1: Install Wireshark and start capturing
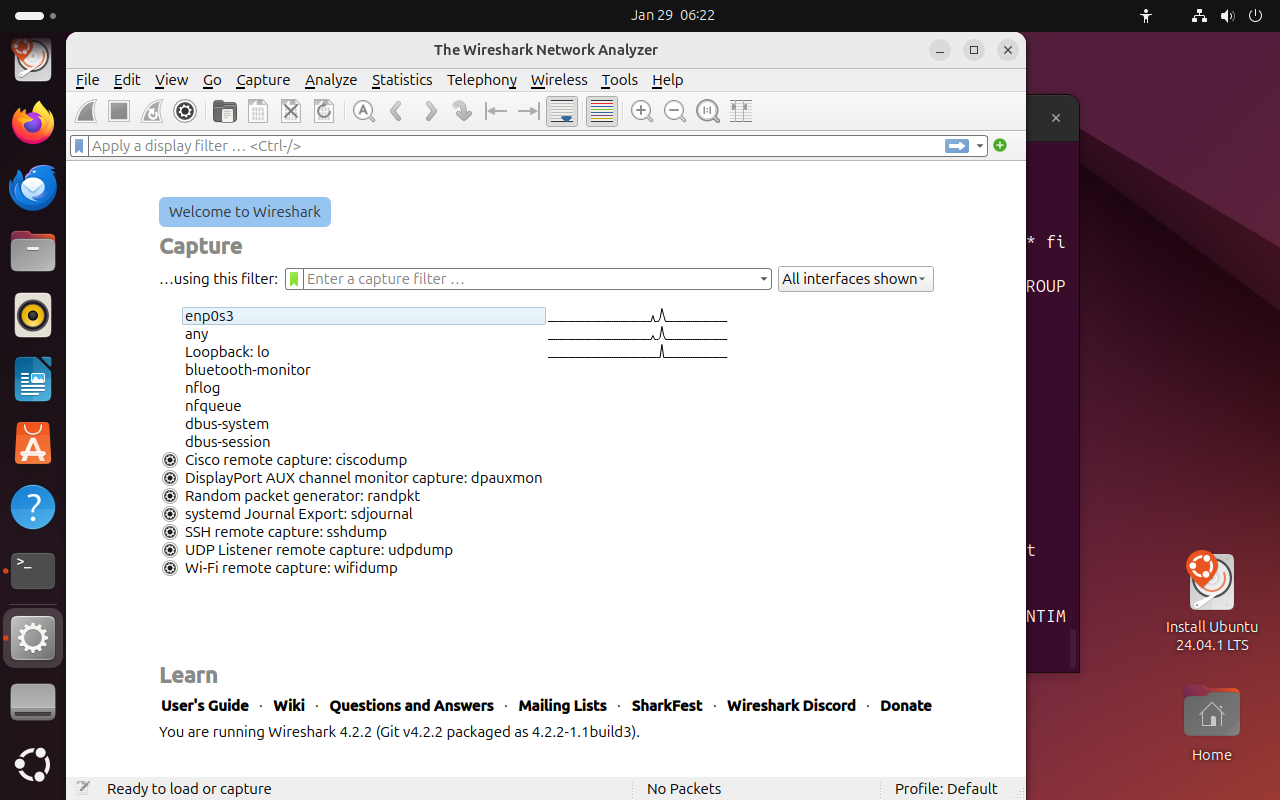
Once you have installed wireshark, open the application.- Select the eth0 interface if it shows up for you. If you don't have an eth0 interface, look for one that looks something like enp0s3 - or you can choose to have your packet capture be over Wi-Fi.
- Open a couple of websites in your browser, for example google.com, Coolmathgames.com, anything works really.
- After visiting a few sites, stop your capture
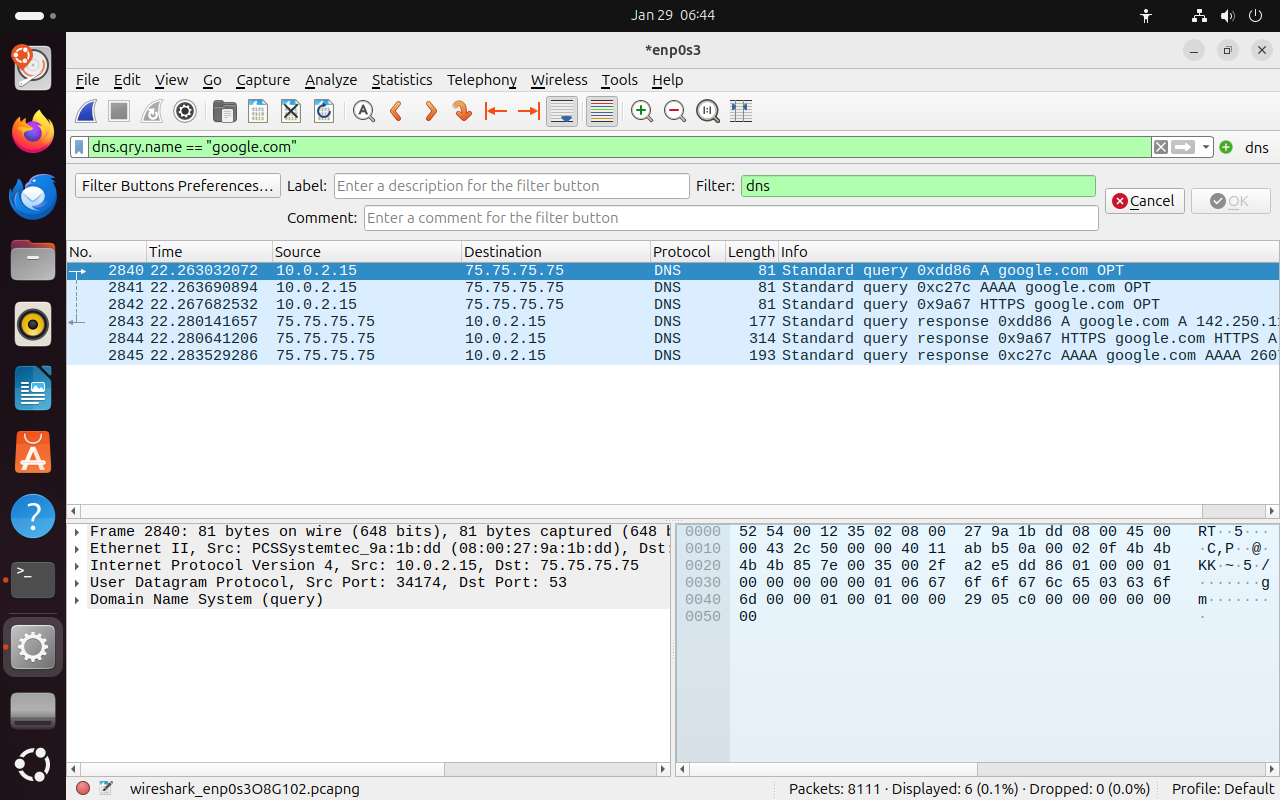
- Filter to isolate DNS traffic for the websites you visited by putting this in the filter bar:
dns.qry.name == "google.com". It should look something like this after:
DNS Traffic
In this section, we'll break down the packets captured during our DNS analysis. Using filters, we'll isolate DNS traffic for the domain google.com. Let's take a look at these packets and break some of them down.Step 2: Analyze the DNS Packet Data
Packet 2840: Standard Query for A Record
- Packet Type: DNS Query
- This is just a standard DNS query packet, where our local machine (10.0.2.15) is requesting the IPv4 address (A record) for the domain google.com
- Key Details:
- Source IP: 10.0.2.15 (Our local machines IP address).
- Destination IP: 75.75.75.75 (Our client's DNS server).
- Query Name: google.com
- Query Type: A (IPv4 address lookup).
- Explanation:
- This packet shows the first step in the DNS resolution process, where your client is asking the DNS server to resolve google.com to an IPv4 address.
Packet 2841: Standard Query for A Record
- Packet Type: DNS Query
- This is another standard DNS query packet, but this time the client is requesting the IPv6 address (AAAA Record) for google.com
- Key Details:
- Source IP: 10.0.2.15.
- Destination IP: 75.75.75.75.
- Query Name: google.com
- Query Type: AAAA (IPv6 address lookup).
- Explanation:
- Many modern systems these days will request both IPv4 and IPv6 addresses for the sake of compatibility. If the server supports IPv6, this address will be used.
Packet 2843: Standard Response for A Record
- Packet Type: DNS Response
- This is just a standard DNS query packet, where our local machine (10.0.2.15) is requesting the IPv4 address (A record) for the domain google.com
- Key Details:
- Source IP: 75.75.75.75. (DNS Server).
- Destination IP: 10.0.2.15 (our client).
- Answer: 142.250.114.139 (IPv4 address for google.com).
- Explanation
- The DNS server resolved google.com to 142.250.114.139 and sent this information back to the client. The browser can now connect to google.com using that same 142.250.114.139 address.
Packet 2845: Standard Response for AAAA Record
- Packet Type: DNS Response
- This packet contains the DNS server's response to the AAAA query we made earlier.
- Key Details:
- Source IP: 75.75.75.75. (DNS Server).
- Destination IP: 10.0.2.15 (our client).
- Answer: 2606:f8b0:4023:1002::64 (IPv6 address for google.com).
- Explanation:
- The DNS server resolved google.com to an IPv6 address and returned it to the client. If your system prefers IPv6 (for some weird reason), it will use this address to connect.
HTTP Traffic
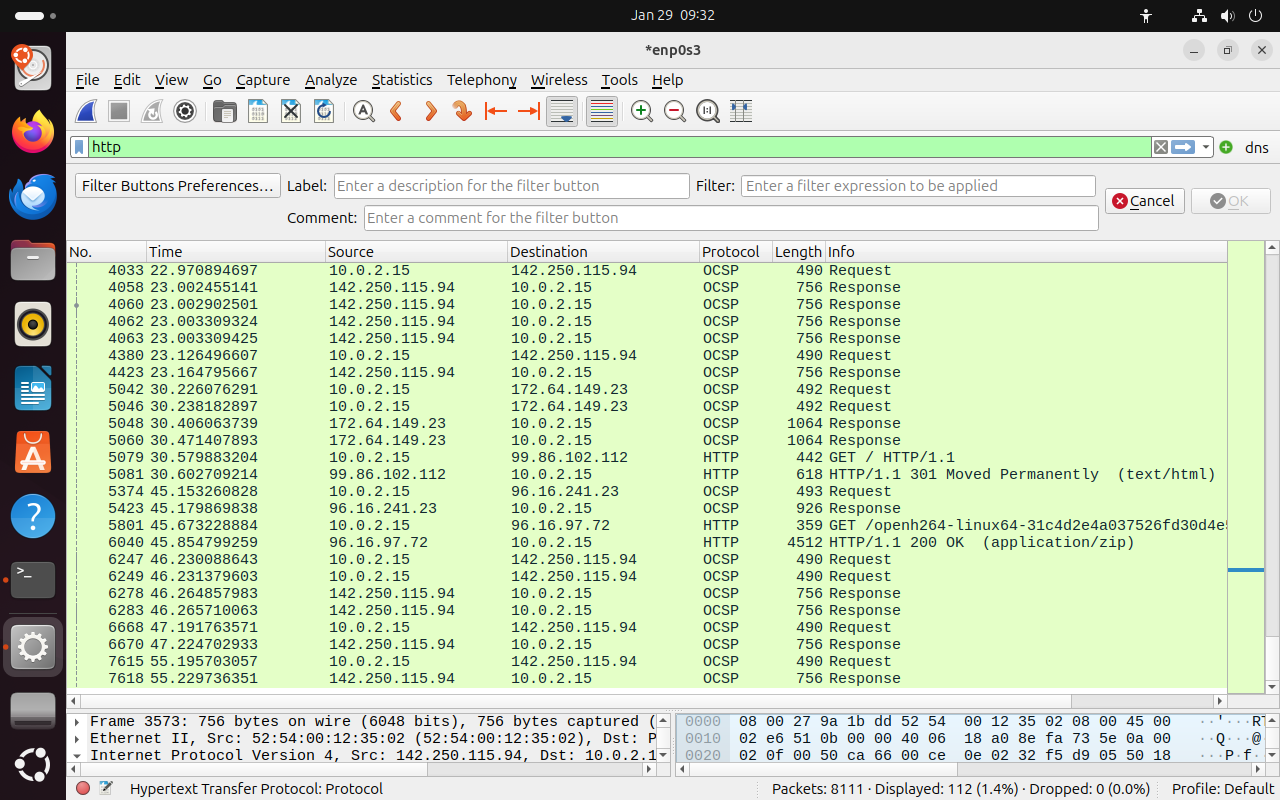
http filter, we can see clear examples of how the client and the server communicate over the network. Let's dig into it:
Step 3: Capture and Analyze the HTTP Packet Data
Use thehttp filter and analyze the http traffic from your capture.
Here's what mine looks like:
Packet 5079: HTTP GET Request
- Packet Type: HTTP Request
- This is a
GETrequest for the root resource (/) of a wesite.
- This is a
- Key Details:
- Source IP: 10.0.2.15(our client).
- Destination IP: 99.86.102.112(the server we are trying to connect to).
- Request Method: GET
- Requested Resource: Root (/).
- HTTP Version: HTTP/1.1
- Explanation:
- Our client sent a GET request to fetch the main resource of the server. This is typically the homepage or base resource of a website.
Packet 5081: HTTP 301 Moved Permanently
- Packet Type: HTTP Response
- This is a
GETrequest for the root resource (/) of a wesite.
- This is a
- Key Details:
- Source IP: 99.86.102.112
- Destination IP: 10.0.2.15.
- Response Status: HTTP/1.1 301 Moved Permanently.
- Content Type: text/html.
- Explanation:
- The server tells the client that the requested resource has moved permanently to another location. This is often used for URL updates or domain redirects.
Packet 5801: HTTP GET Request for Specific File
- Packet Type: HTTP Request
- This is a
GETrequest for a specific file (/openh264-linux64-...), which looks like a compressed resource or library.
- This is a
- Key Details:
- Source IP: 10.0.2.15.
- Destination IP: 99.16.97.72
- Request Method: GET
- Requested Resource: /openh264-linux64-...
- HTTP Version: HTTP/1.1
- Explanation:
- Our client is likely requesting a codec or library file, which is commonly needed for browser functionality.
Packet 6040: HTTP Response
- Packet Type: HTTP Response
- The server provides the requested file with a
200 OKstatus.
- The server provides the requested file with a
- Key Details:
- Source IP: 96.16.97.72.
- Destination IP: 10.0.2.15.
- Response Status: HTTP/1.1 200 OK
- Content Type: application/zip
- Explanation:
- The server successfully delivered the requested resource in a compressed (
application/zip) format, completing the request-response process!
Finished!
Nice! You’ve just completed the packet analysis project and should now have a solid understanding of how to capture, filter, and analyze network traffic using Wireshark. In the scope of this project, you've familiarized yourself with DNS resolution, dissected HTTP communications, and got hands-on with key networking concepts. Remember, practice, pracetice, practice! You can only get so much out of completing something once. Good thing about this project is you can analyze new packets by simply going out and connecting to public Wi-Fi wherever you're at. Always use these tools ethically! Next time you try this lab out, try exploring additional protocols like TLS, ICMP, or FTP. Each time you dive back in, challenge yourself to experiment with different filters, uncover new patterns, or analyze more complex traffic flows. Congrats on completing this project! Keep practicing, keep experimenting, and be proud of the progress you’re making!